Many organisations handle financial documents such as purchase orders, invoices, and receipts in a manual and labour intensive process. Tasks include monitoring email inboxes, reading and extracting information from attachments, and manually entering data into other Enterprise Resource Planning (ERP) or Customer Relationship Management (CRM) systems. These manual actions and processes can be automated using various tools and workflows in a solution that saves time, effort, and reduces errors.
In this lab project I’ll walk through the development of a Robotic Process Automation (RPA) workflow to monitor an email inbox, extract data from attachments, send a review for human approval, and enter the extracted data into another third-party application on a local computer. A fully autonomous process will be developed that can run in the background with no supervision and is designed to reduce many manual tasks.
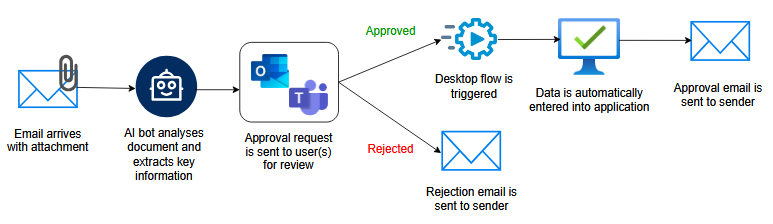
The goal is to create a bot that will perform a set of pre-defined document processing actions automatically when an email is received and matches certain conditions. A Microsoft Outlook email inbox will be monitored by a bot to recognise when an email contains an invoice attachment and certain text in its subject line or body that triggers a further processing workflow.
Artificial Intelligence (AI) developed and trained with the Microsoft AI Builder tool will analyse and extract key pieces of information from the attachments in the email. The extracted data and attachment will then be forwarded to a human to perform a final review and approval either in Microsoft Teams or Outlook where they can choose to Approve or Reject the request in the original email. If approved, the bot will then open an application on a local computer and enter the information automatically into the application using its own mouse movements and keyboard inputs.
Many of the aspects featured in this lab follow and build upon the Microsoft Learning Path and Modules Automate processes with Robotic Process Automation and Power Automate for desktop [1]. Some actions and workflows used in this lab have been modified from those provided by Microsoft. Other actions can be easily modified and customised with different functionality and actions to suit various use cases and scenarios. Examples include adding web browser automation or Microsoft Excel integration which can enter or manipulate data on websites or in spreadsheets instead of local desktop applications.
Disclaimer
Most of the Microsoft based applications and tools used in this lab can be obtained through free limited-time trials typically offered for 30, 60 or 90 days depending on the individual application. A free 30-day trial or fully licenced version of Microsoft 365 Business Premium can perform most of the activities in this lab. Some tasks do require a trial or subscription to premium features such as Microsoft Power Automate. Administrator access to a Microsoft 365 tenant and portals such as M365 Admin Center, Power Platform Admin Center, and Microsoft Azure is also recommended for some configuration and setup tasks.
Licencing requirements and products are frequently changing, so it is impractical to provide a solution for every possible environment, use-case, and situation. Refer to official Microsoft guidance and online resources for up-to-date licencing information and feature availability.
Resources Required
Microsoft Windows 11 (Pro/Enterprise recommended)
Microsoft Power Automate Desktop App (full installation)
Power Automate Machine Runtime App
Microsoft Demo Contoso Invoicing Application
Microsoft 365
Microsoft Dataverse
Microsoft Power Automate Premium
Microsoft AI Builder
Copilot Studio credits
Microsoft Outlook
Microsoft Teams
Microsoft Azure subscription (only required if using a Power Automate Premium 90-day trial to subscribe to Pay-As-You-Go Copilot Studio AI credits. A full Power Automate Premium licence may come with some limited monthly AI credits)
Some technical knowledge and previous experience creating and editing Power Automate flows
Additional Information
The process of creating a small database in Microsoft Dataverse is not covered in this lab, and it is assumed that one may already exist if you are using an existing M365 environment/tenant. Certain Power Automate actions such as the AI Builder are required to connect to a Dataverse database. If one doesn’t already exist or your environment is brand new (using an M365 trial), follow this learning module and guide[2] on how to create one for this lab.
The process of acquiring Microsoft Copilot Studio credits to perform AI Builder based actions such as document analysis in Power Automate is not covered in this lab. Depending on the type of Power Automate Premium licence (Trial or Paid), monthly AI credits may be automatically included in a licencing plan. The Power Automate Premium 90-day trial version was used in this lab and therefore required a Microsoft Azure subscription and setup of Pay-As-You-Go billing for usage of Copilot Studio credits. This was then connected to and enabled within the Power Platform Admin Center. This specific setup and walkthrough are not covered in this lab, but a guide on how to do so is provided on Microsoft Learn [3].
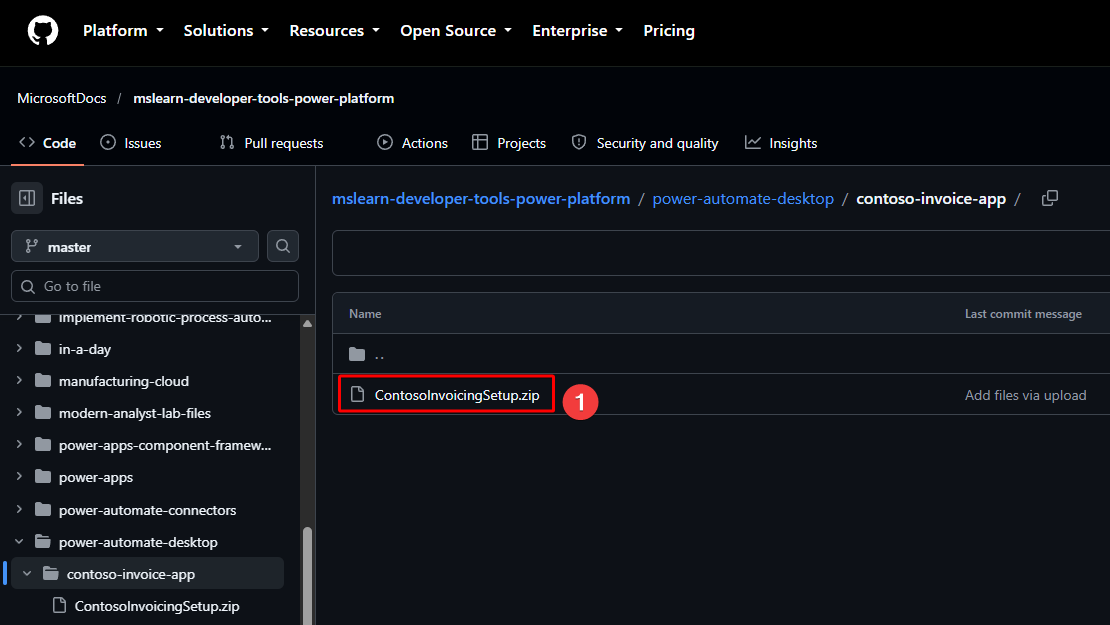
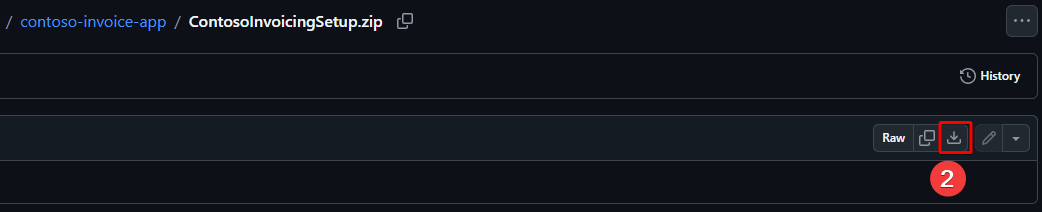
The first part of this Robotic Process Automation solution is to create a desktop flow that will be triggered to perform data entry activities on a local computer. The full Microsoft Power Automate Desktop and Machine-Runtime apps must be installed on a local computer to trigger local desktop flows from the cloud automatically as required in this lab. Microsoft also provides a small demo invoicing application that can be installed on a local computer for testing and will be used throughout this lab.
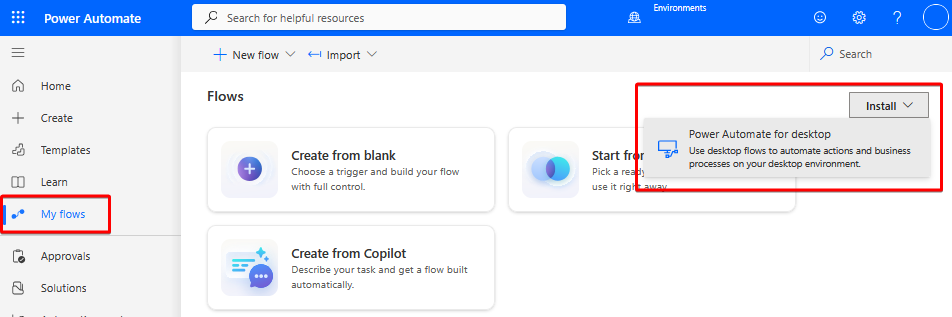
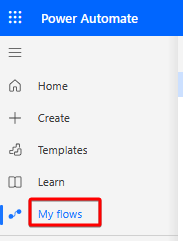
Log into the Power Automate cloud portal with your Microsoft account. Select the My flows menu item and download the Power Automate for Desktop app.
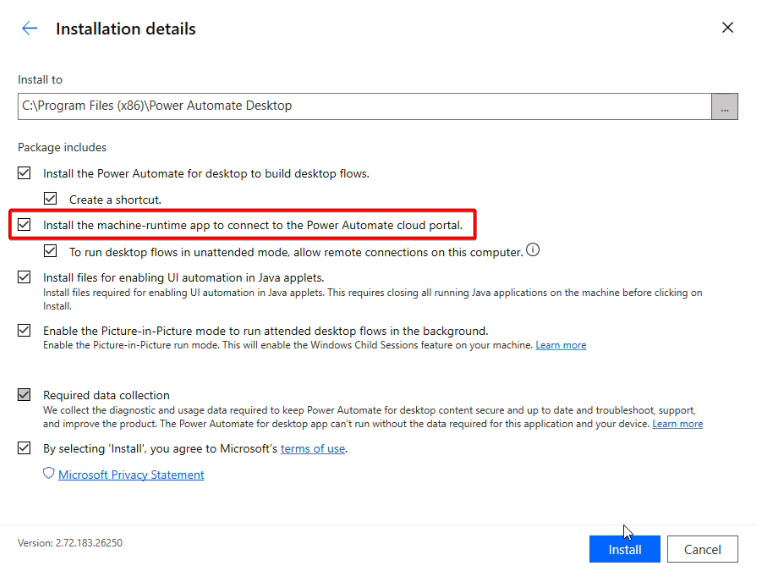
Run the setup and installation file ensuring that the machine-runtime app option is selected during installation.
Open the newly installed Power Automate app and sign-in with your Microsoft 365 account using the Work/School option.
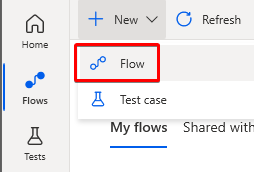
Select the Flows button from the navigation menu on the left-hand side of the screen, then New, and Flow to create a new desktop flow.
Give it a name and select Create.
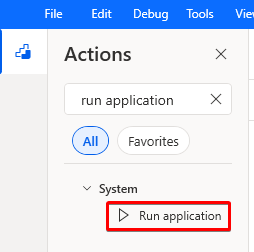
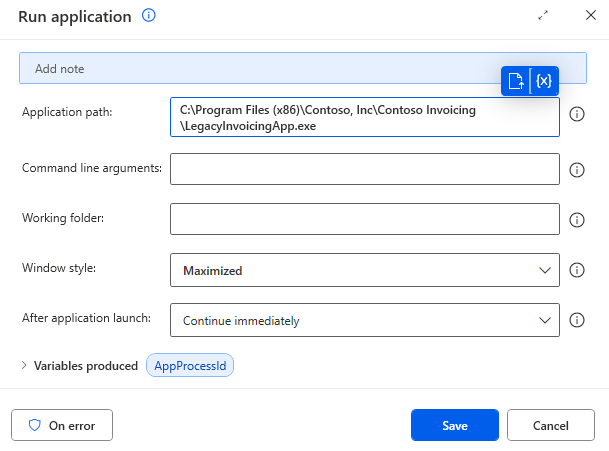
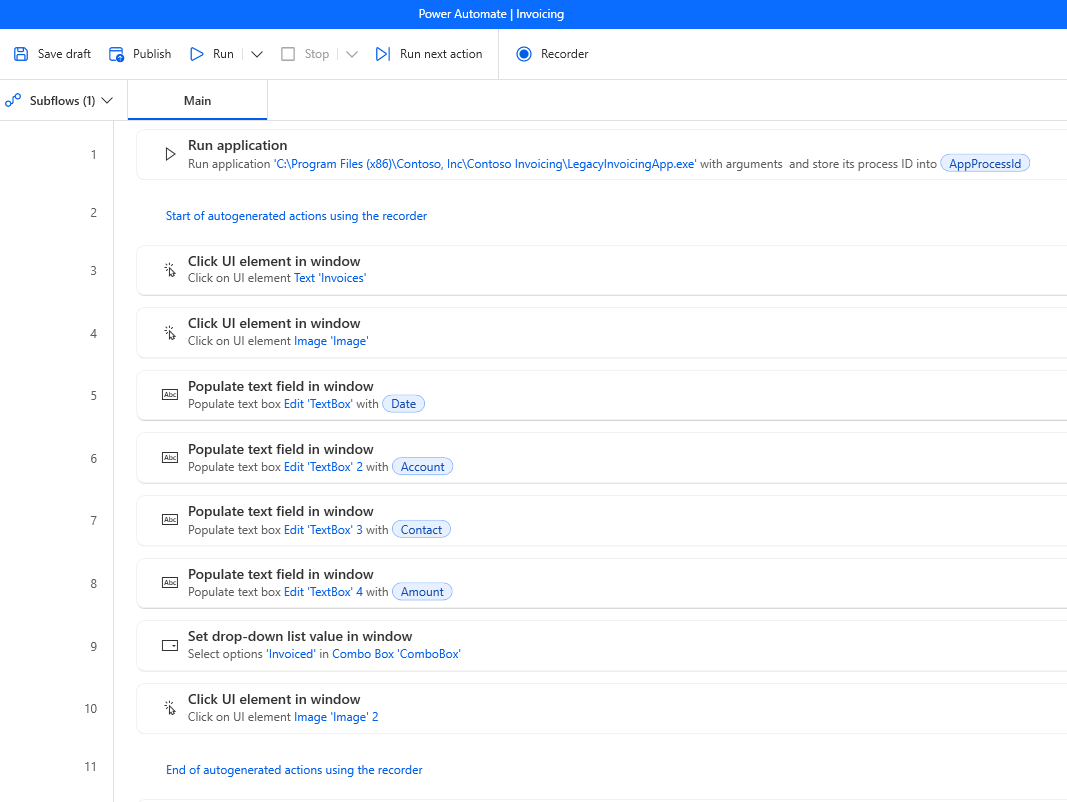
Using the search bar on the top left of the screen, search for the Run application action and drag it into the workspace. Fill out the application path of C:\Program Files (x86)\Contoso, Inc\Contoso Invoicing\LegacyInvoicingApp.exe and click Save.
Open the Contoso Invoicing application and leave it open in the background. Return to your Power Automate desktop flow window.
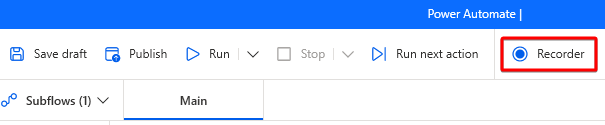
Select the Recorder button on the top of the screen to begin recording your desktop actions. This will allow the flow to perform the same actions as you by clicking and entering text just like you have when recorded.
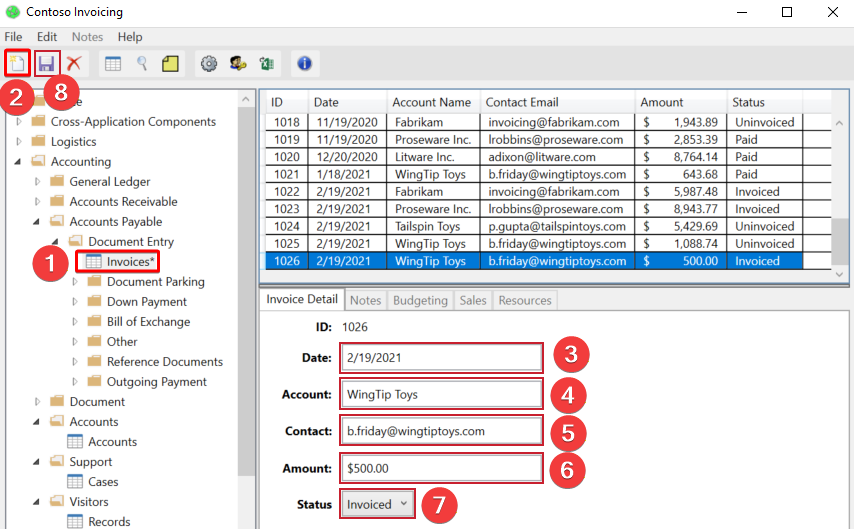
Click on the Invoices menu item on the left side of the screen, then New Item icon and fill in the information for Date, Account, Contact, Amount, Status, and click Save whilst still recording your desktop actions. These values can be random or anything for now whilst building the initial flow. Once complete, select Done in the recorder window. For more info: https://learn.microsoft.com/en-us/training/modules/build-first-desktop-flow/5-record-desktop-actions
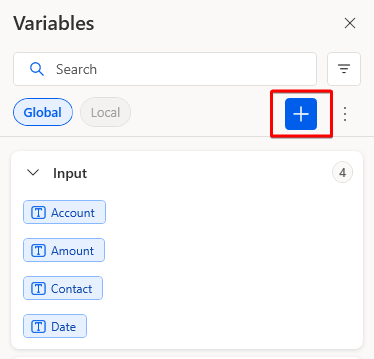
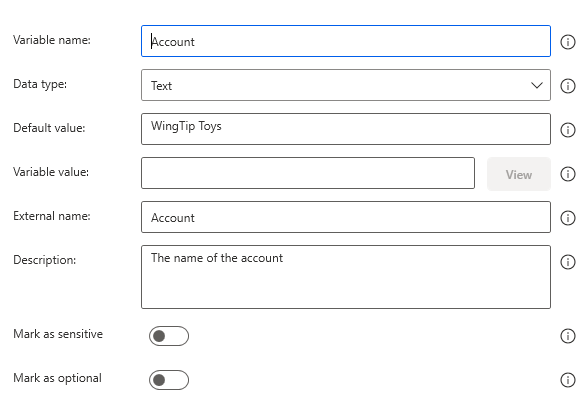
In the Variables menu on the right-hand side of the screen, click on the plus icon to add four new input variables into the desktop flow which will make them dynamic and enable AI to save any values into them later on. Create the variables Account, Amount, Contact, and Date ensuring that they are all text data types.
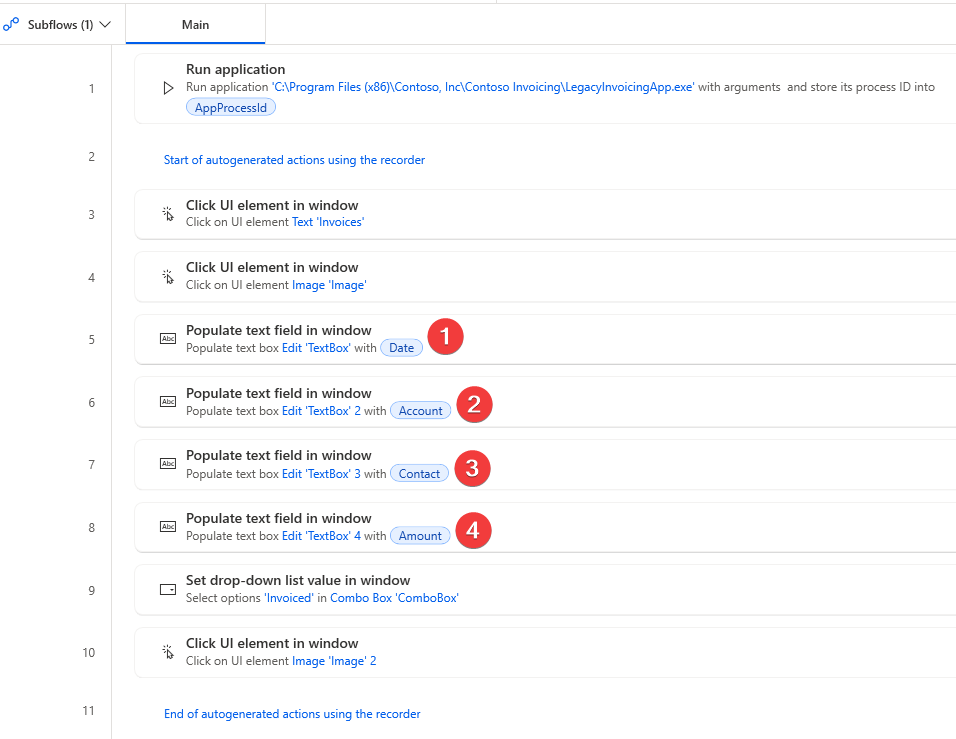
Replace the existing text values in your flow with the newly created input variables.
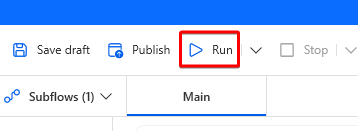
Test your desktop flow by clicking on the Run button on the top of the screen. The flow should automatically open the Contoso Invoicing application and enter your values into the application. Later on, these values will be different depending on the content within an invoice email attachment.
The final desktop flow should look like the below image:
Part 2 - Creating a Cloud Flow and connecting it to your Desktop Flow
A cloud flow is required to perform the remaining automation actions that include monitoring an email inbox, extracting data, and entering it into the Contoso Invoicing application using a desktop flow on a local computer. To connect and allow a Power Automate cloud flow to trigger a desktop flow, the computer running the desktop flow must be registered and added to your Microsoft Power Automate and Dataverse environment/tenant.
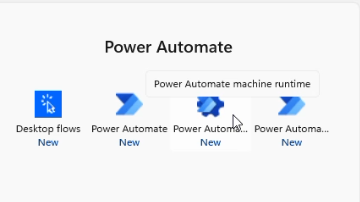
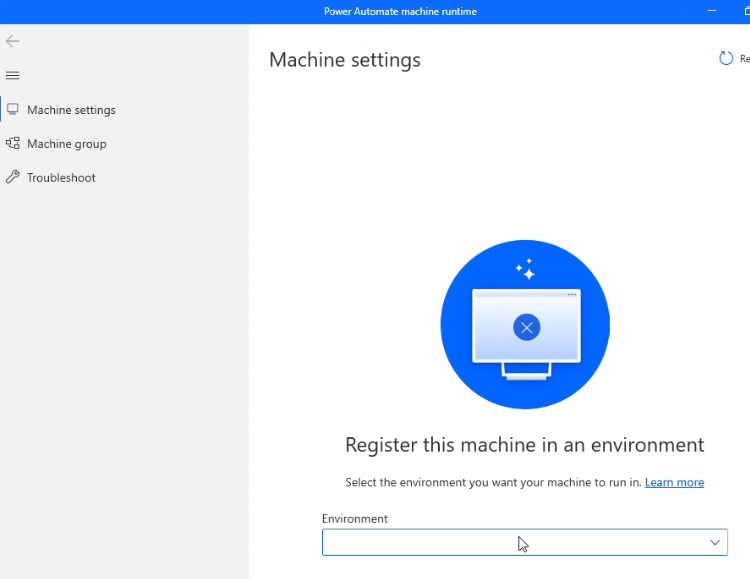
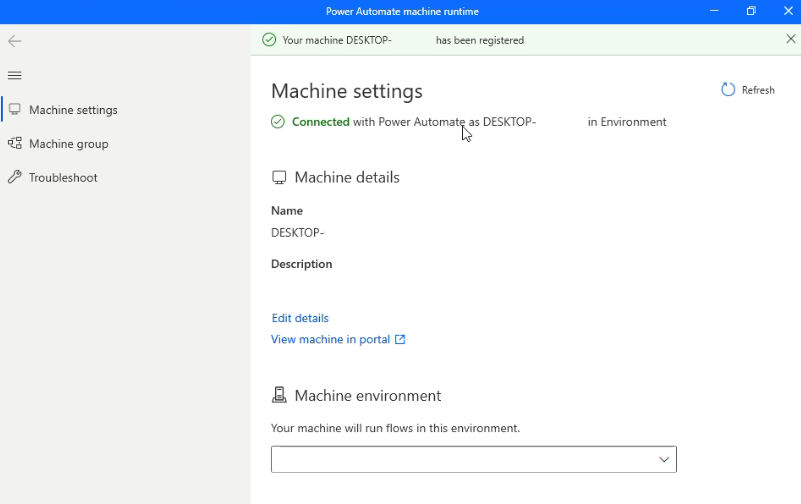
Open the Power Automate machine runtime app on your computer and select your environment from the dropdown menu. After selecting the environment, your computer will be automatically registered.
Open the Power Automate cloud portal in a web browser to create a new cloud flow.
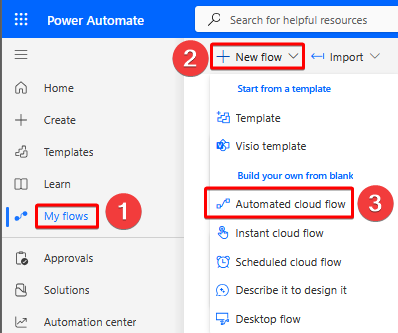
Select My flows to open the flow overview screen, then New flow, and Automated cloud flow.
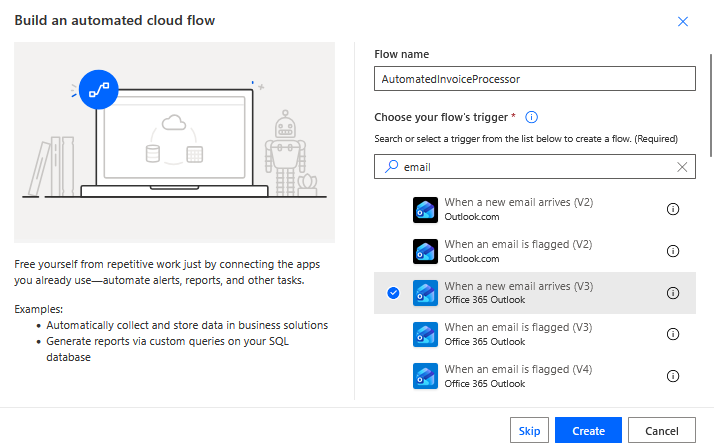
Give your new flow a name, choose the trigger When a new email arrives (V3), and select Create.
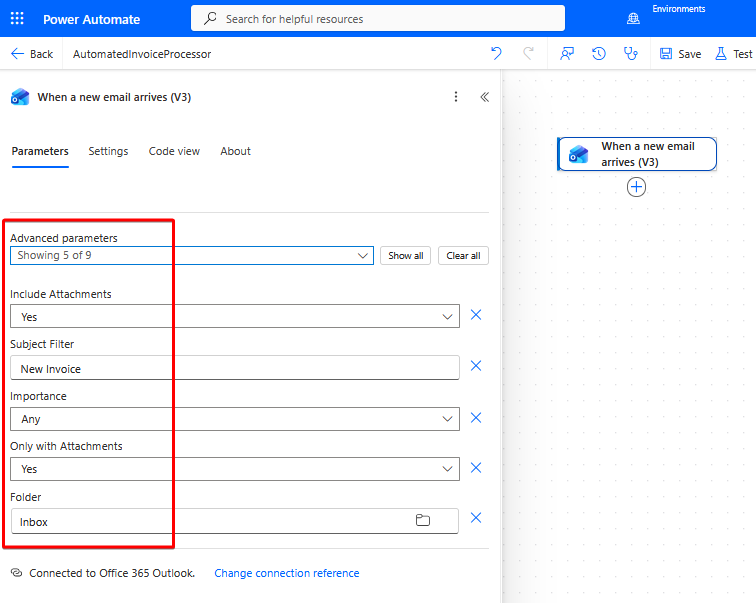
Click on the action When a new email arrives (V3) to edit its properties. Select the Advanced parameters dropdown and select the Subject filter option to add it to the action.
Set the parameters of Include Attachments to Yes, Subject Filter to New Invoice (or this can be whatever you like), and Only With Attachments to Yes.
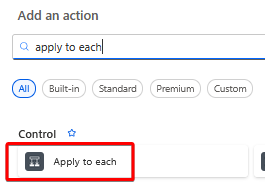
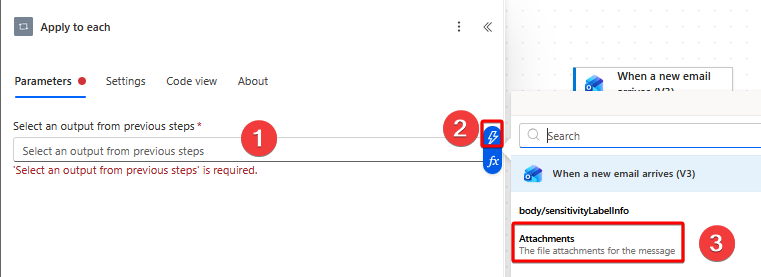
Add a new action below the email by selecting the + icon. Search for the Apply to each action and add it to your flow.
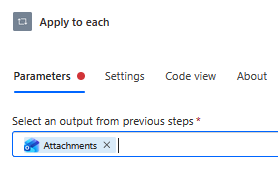
Click on the parameters and input field, then the small lightning bolt icon, and Attachments under When a new email arrives (V3).
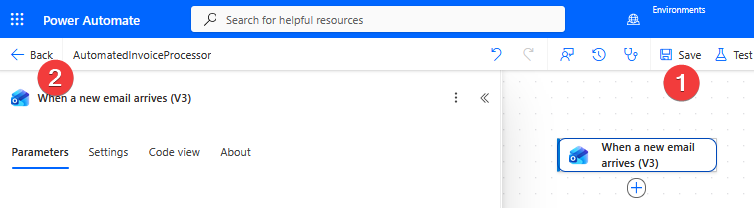
When done, select Save to save your current flow then Back to return back to the main menu for the following tasks.
Microsoft AI Builder within Power Automate is used to create and train a custom AI model to analyse provided invoices and extract key pieces of information from them.
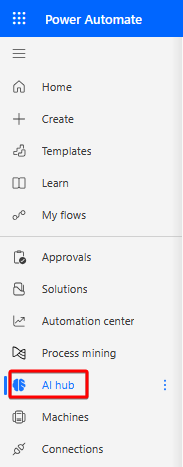
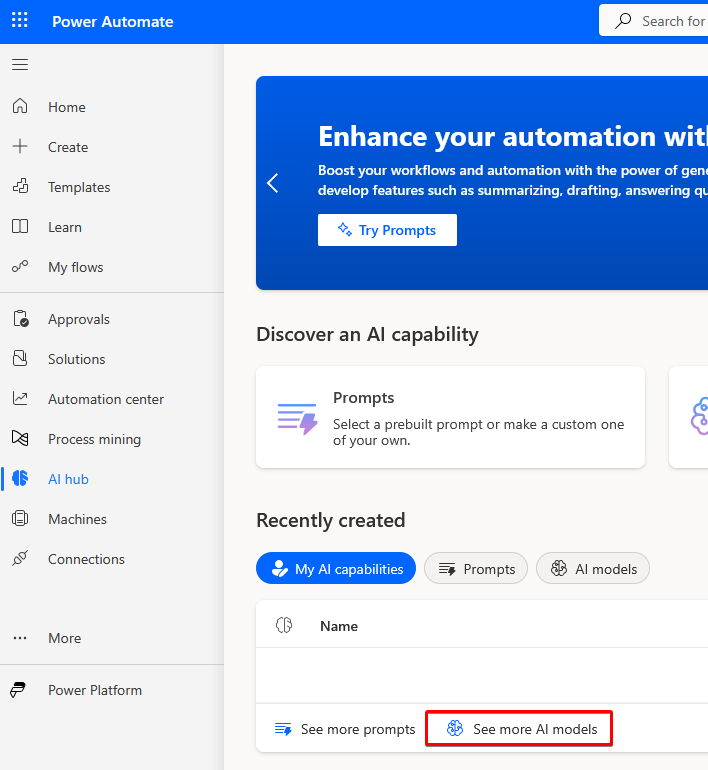
In the navigation menu on the left side of the screen, select the AI hub item to view all of the available AI features.
Click on the See more AI models option to open the AI models menu.
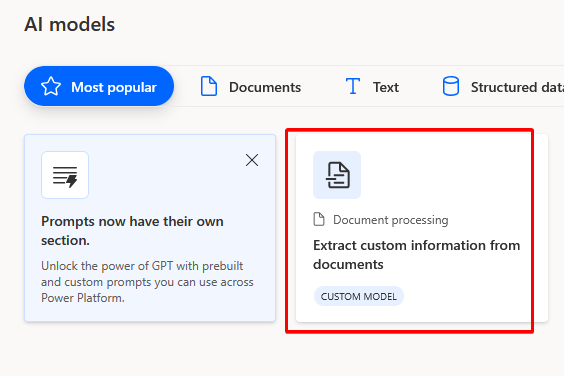
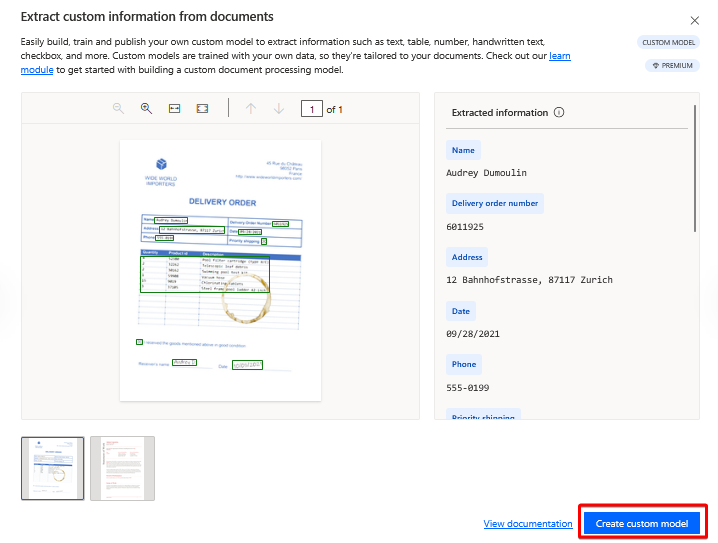
Select the Document processing CUSTOM MODEL, then Create custom model to build and train our own custom AI model.
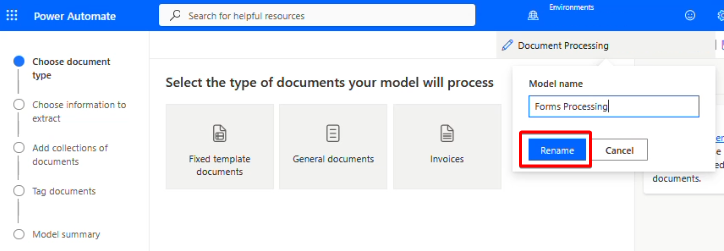
Select the small pencil icon on the top right of the screen to change the model’s name. This will help to uniquely identify it as a custom model and make it easier to select later on.
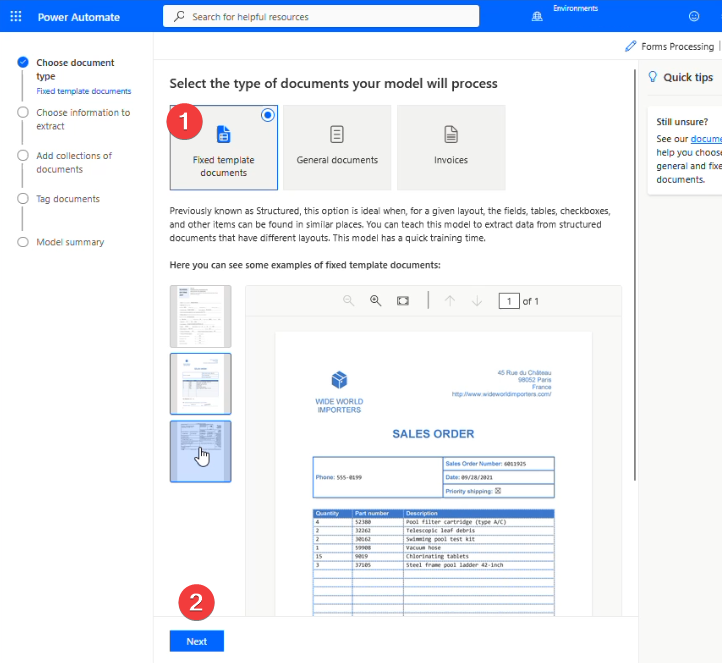
Select the Fixed template documents option and then Next.
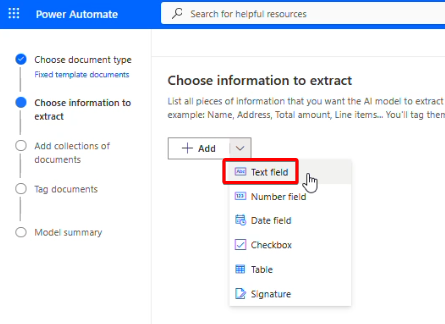
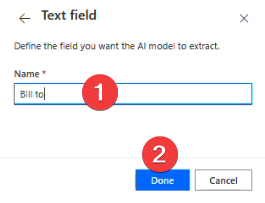
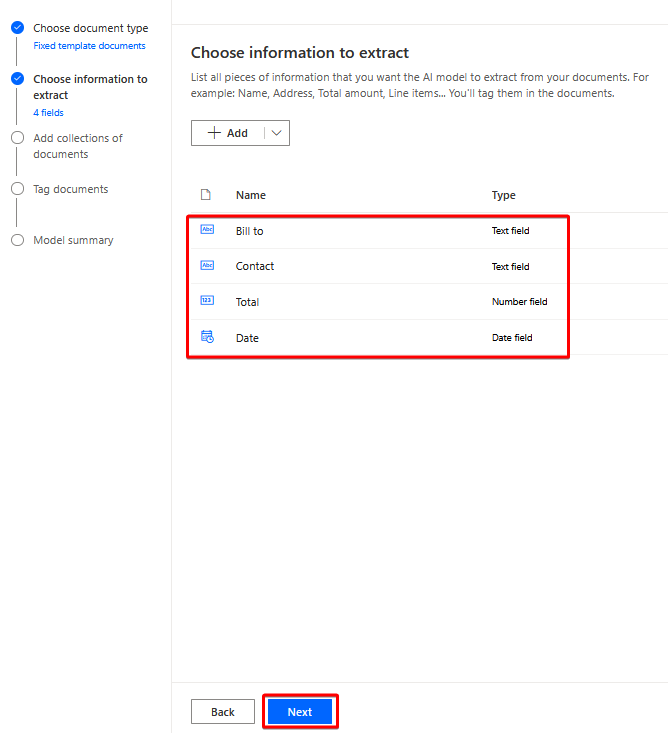
Click the Add dropdown menu and select Text field, change its name to Bill to, and select Done to add a new text field. Do the same process for three other fields of Total, Contact, and Date ensuring their data type is appropriate.
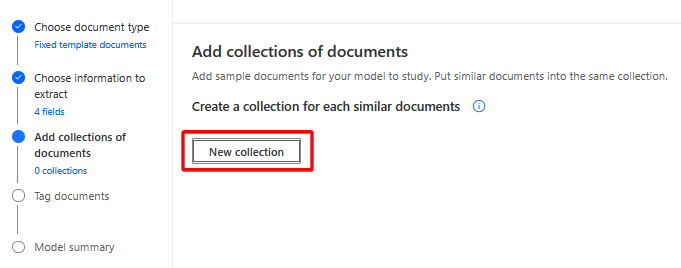
Click the New collection button to open the add documents menu.
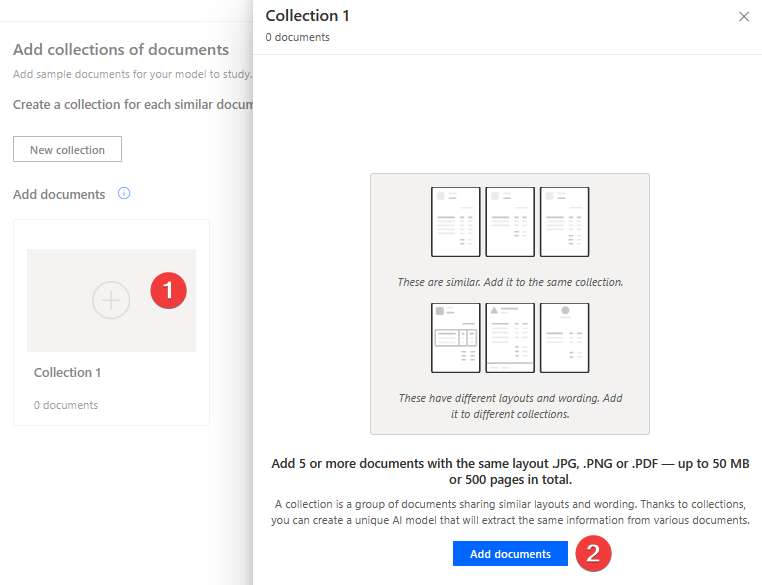
Select the new collection then Add documents.
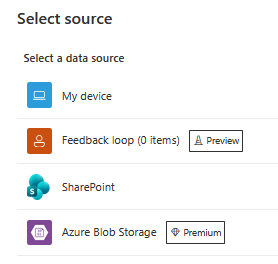
Select your source of documents for uploading. In this lab, My device was chosen to upload documents from the local computer.
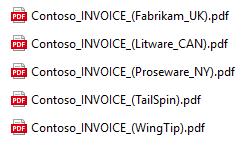
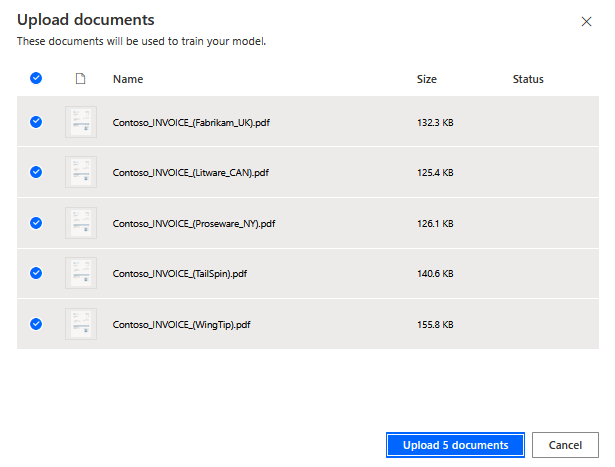
Upload your documents for training the AI model. When completed select Upload documents and Next.
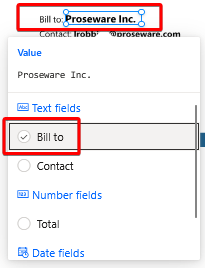
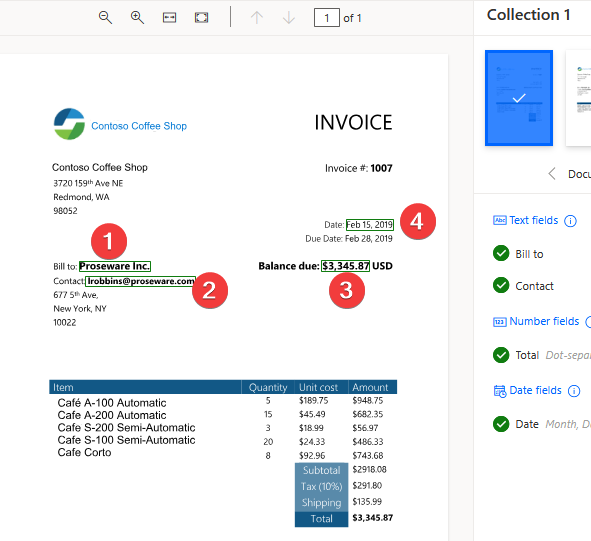
The AI model now needs to be trained on our documents. For each document you must select where each field and type of information is located. Select document 1 and highlight by drawing a box around each corresponding type of information for Bill to, Contact, Total, and Date within the document.
When the document goes blue with a white tick signifying that all fields have been filled in and you have made sure the data is actually correct, you can move on to the next document. Repeat the process for all the other documents and select Next at the bottom of the screen when all are complete.
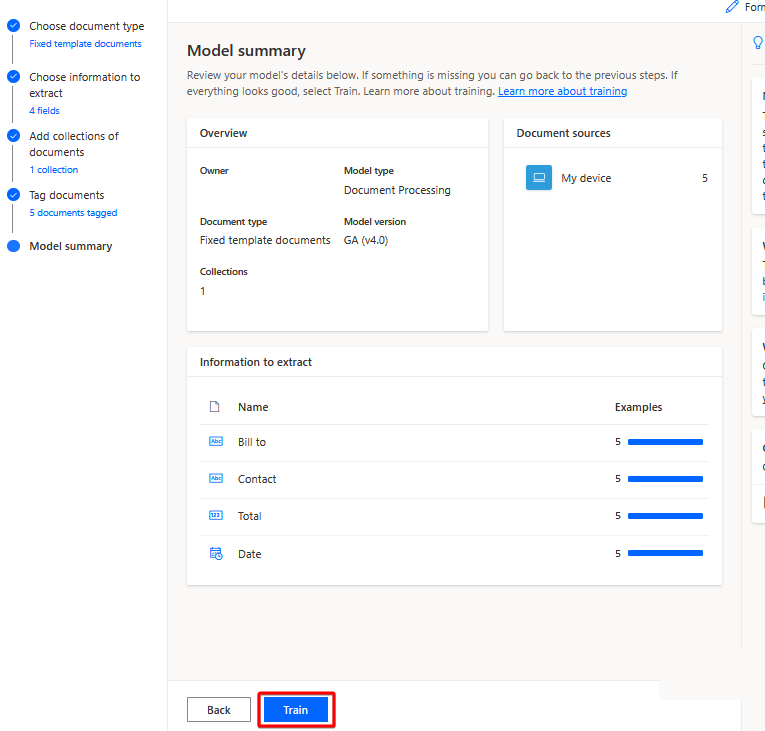
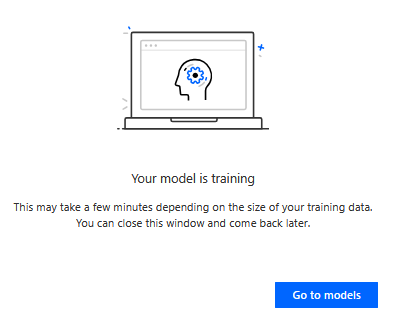
Review your summary and select Train to finish creating your custom AI model. Select Go to models when completed.
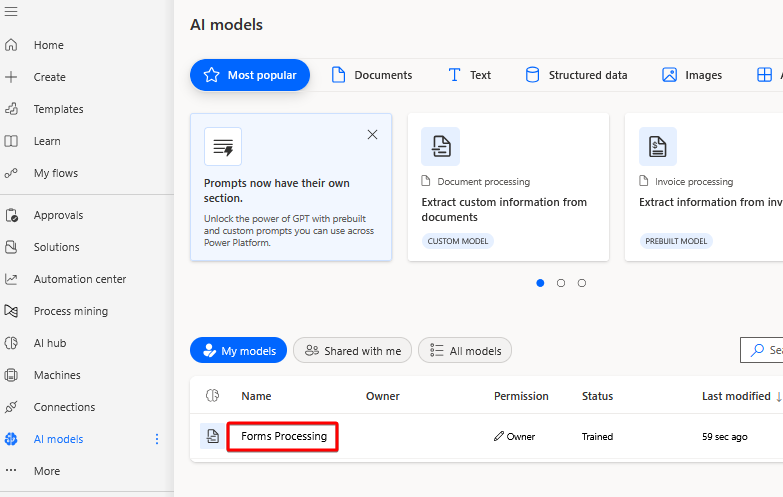
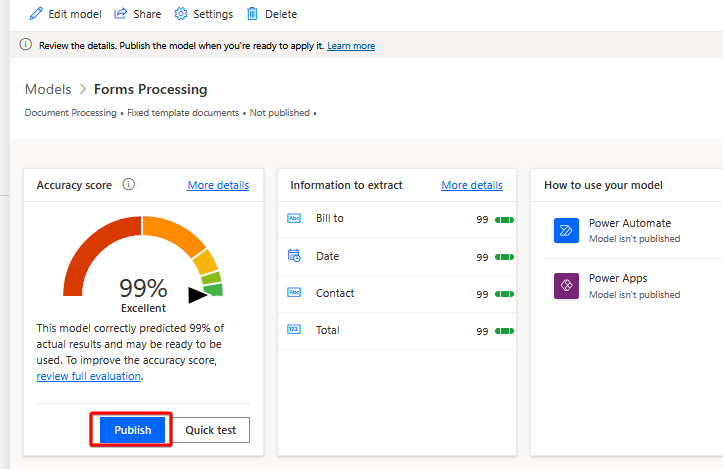
In the AI model menu, click on your new model and then select Publish to make it available for use within your Power Automate flows.
Having now built a custom AI model for analysing and extracting information from invoice documents, we can build the rest of the automation solution by combining all the necessary components together.
Go back to the My flows section in the left navigation menu.
Hover over your previously created cloud flow and click on the small pencil icon to edit it.
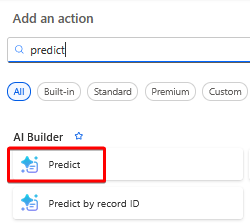
Under the Apply to each action, click on the + icon and search for the Predict action. Add it into your flow.
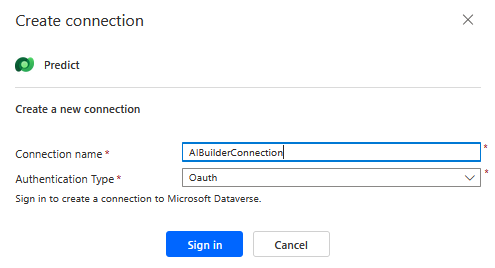
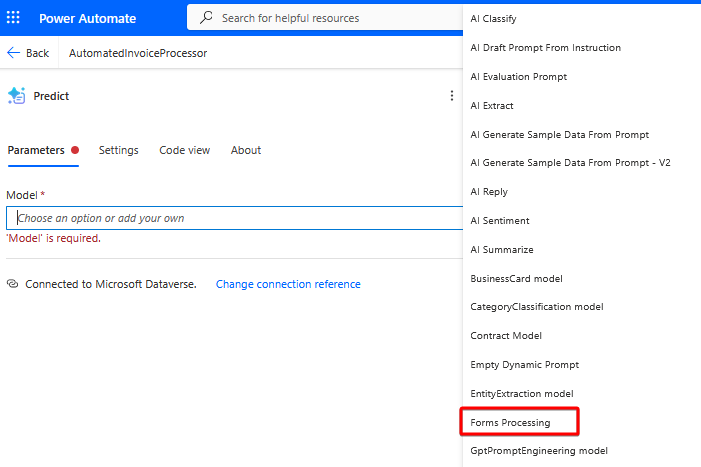
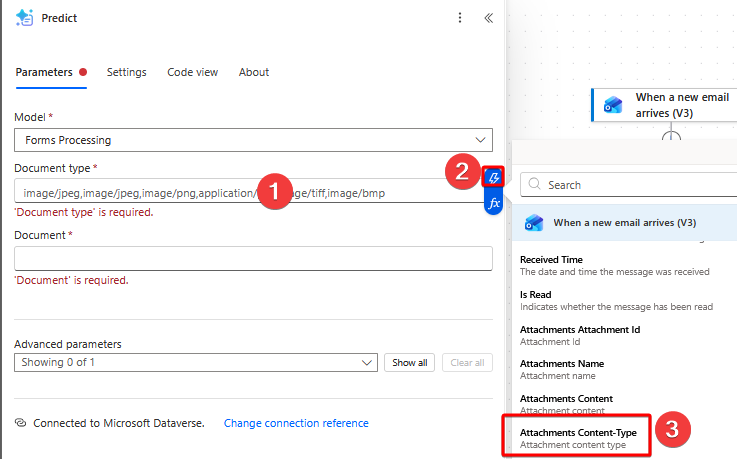
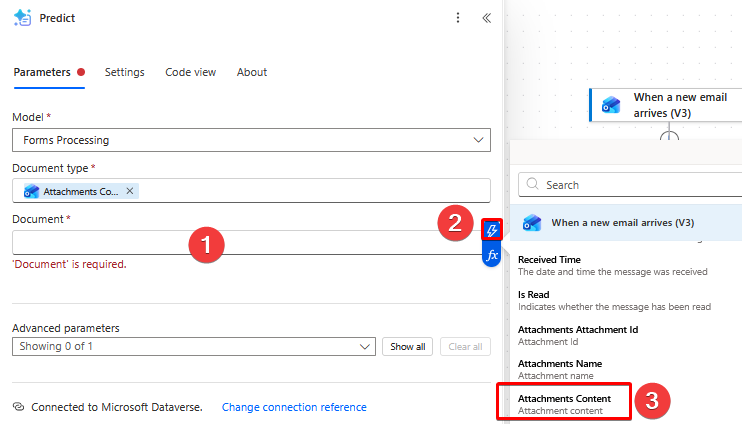
After adding it, you will be prompted to create a Dataverse connection. Give it a name and select Sign in. Then select your custom AI model and fill in the remaining fields with Attachments Content-Type and Attachments Content.
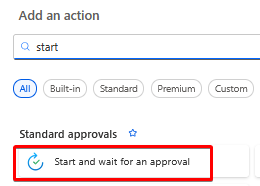
Under the Predict action, click on the + icon and search for the Start and wait for an approval action. Add it into the flow.
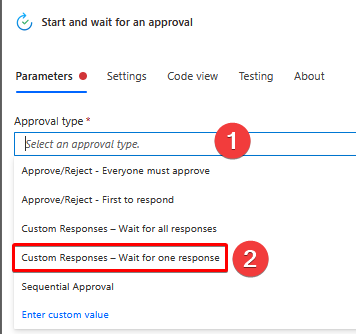
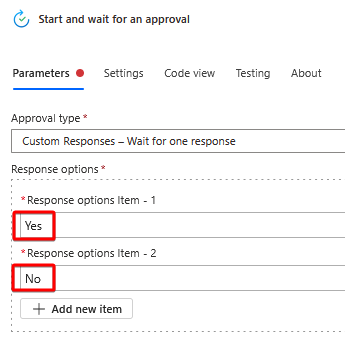
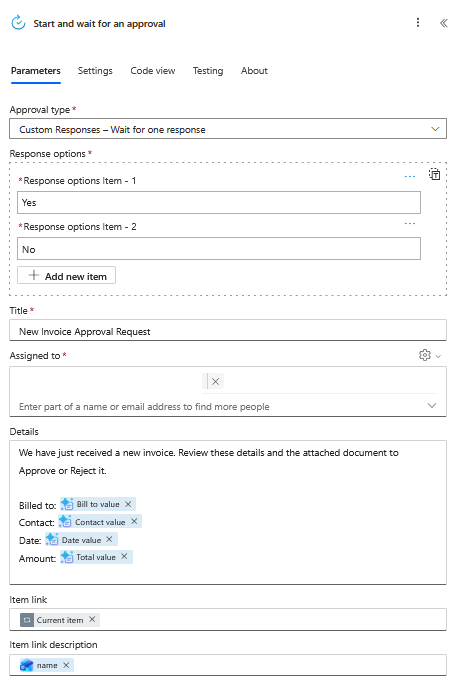
The parameters for this action can be customised or changed for specific use cases. This lab scenario is assuming that an approval request could be sent to multiple people to review an invoice and only one of them needs to approve it. In a situation where one or more of those people are unavailable or cannot respond, another person can review it and approve it. For this specific design choice and approval type, select Custom Responses - Wait for one response.
In the Response options section, fill out the first field with Yes, then select Add new item and fill it out with No.
The Title field can be whatever you like. The Assigned to field are the people that the approval request will be sent to. Add one or more email addresses depending on how many approvers you would like. The Details field allows for creating a message to the recipient inside the approval request. The Item link field gives a direct link to view the attachment that was within the initial email. The Item link description field is placeholder text for the attachment link.
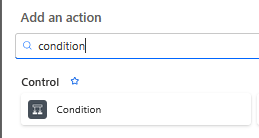
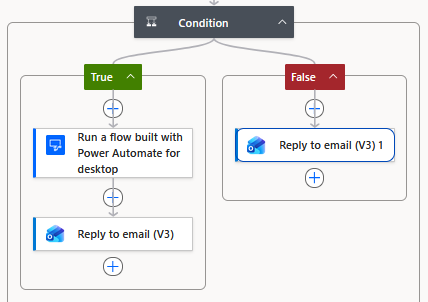
Under the Start and wait for an approval action, click on the + icon and search for the Condition action. Add it into the flow.
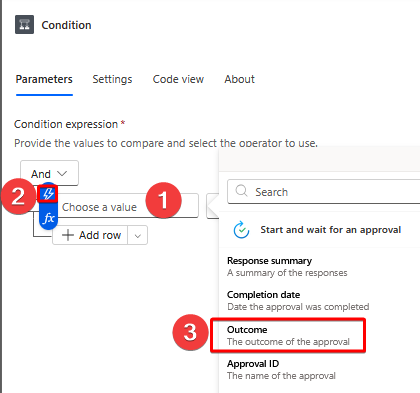
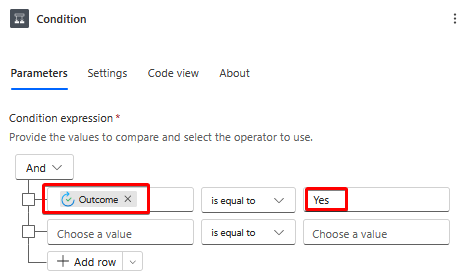
Within the Condition parameters, select the Choose a value field and the small lightning bolt icon, then Outcome under the Start and wait for an approval output. Leave the middle option to is equal to but change the other value to Yes.
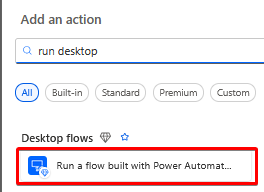
Under the True box, select the + icon and search for the Run a flow built with Power Automate for desktop
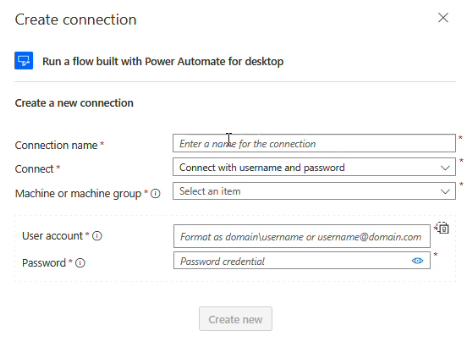
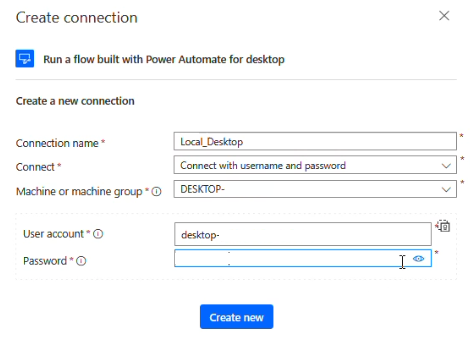
Fill in the details to create a new connection to your desktop flows. Give it a custom name, select the computer from your existing pool, and provide your computer’s username and password to login locally. These parameters can vary depending on the type of computer, whether it is domain joined etc. The credentials can also be handled by a service such as Azure Key Vault for easier and more secure credential management, but this method and advanced setup is out of scope for this lab.
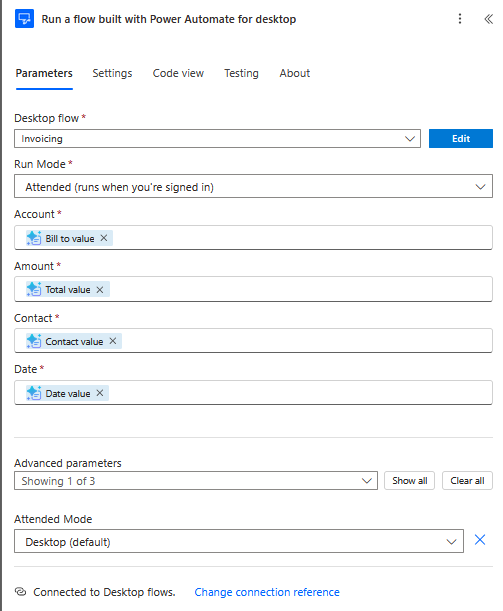
Select your previously created desktop flow that performs automated actions in a local desktop application and Attended mode. The other fields Account, Amount, Contact, and Date are dynamic values that should be assigned from the Predict AI Builder action. These values will be passed into the execution of the local desktop flow and are generated dynamically based on the content within an invoice attached to an email.
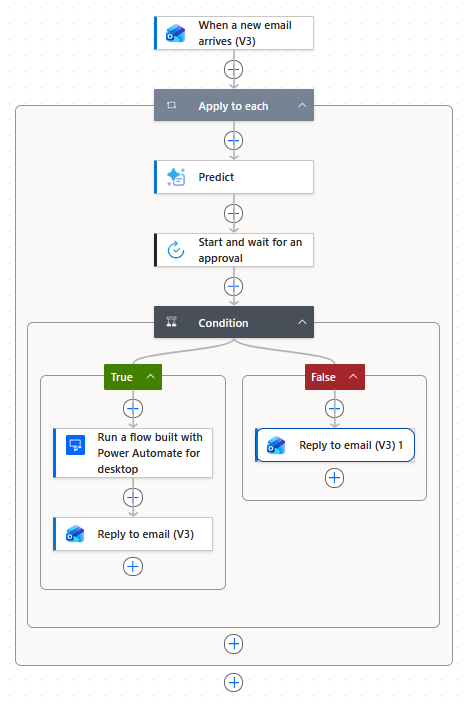
Add two more actions of Reply to email (V3) with one under the desktop flow action and the other under the False option.
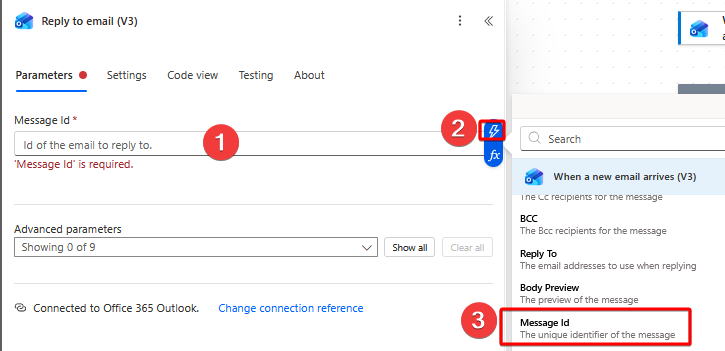
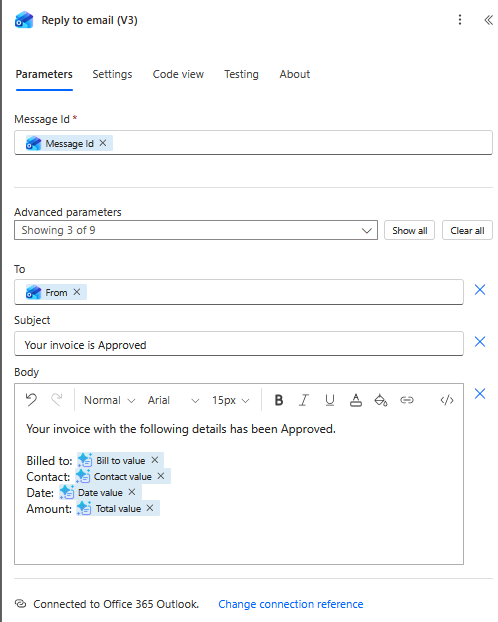
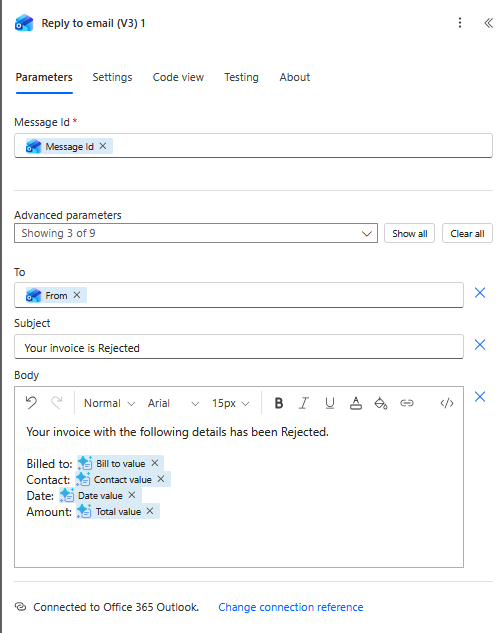
Within each of the Reply to email (V3) actions, select the Message Id from the initial trigger of When a new email arrives (V3) action. Add the To field and value by selecting the From address in the initial trigger When a new email arrives (V3) action. Add some custom text in the body based on the approval result.
The final cloud flow should look like the below image:
Select Save and return back to the flow main menu. Your flow should now be ready for use. Send yourself an email with an invoice attachment and corresponding subject line to test your flow and watch it open the Contoso Invoicing application automatically on your computer. You can also monitor the flow from the Run history panel in Power Automate.
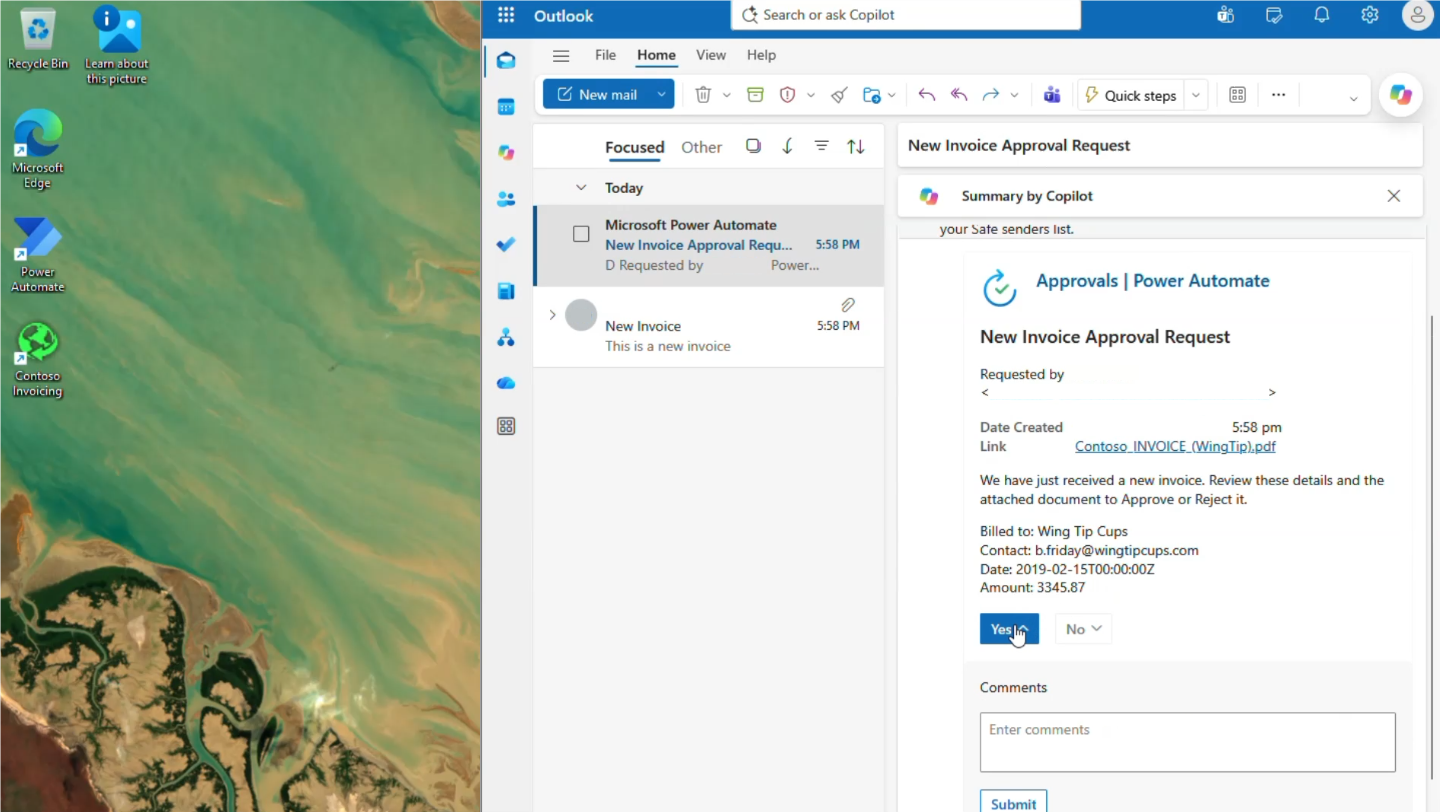
When an email arrives in your target inbox, you will receive a review and approval request in both Microsoft Outlook and Teams. Either application can be used to review and approve or reject the request. An example of a Power Automate Approval Request via Microsoft Outlook is shown below. After you have reviewed the details and attachment in the request, you can click Yes to accept it and trigger the remaining workflow to automatically enter data into the Contoso Invoicing application.
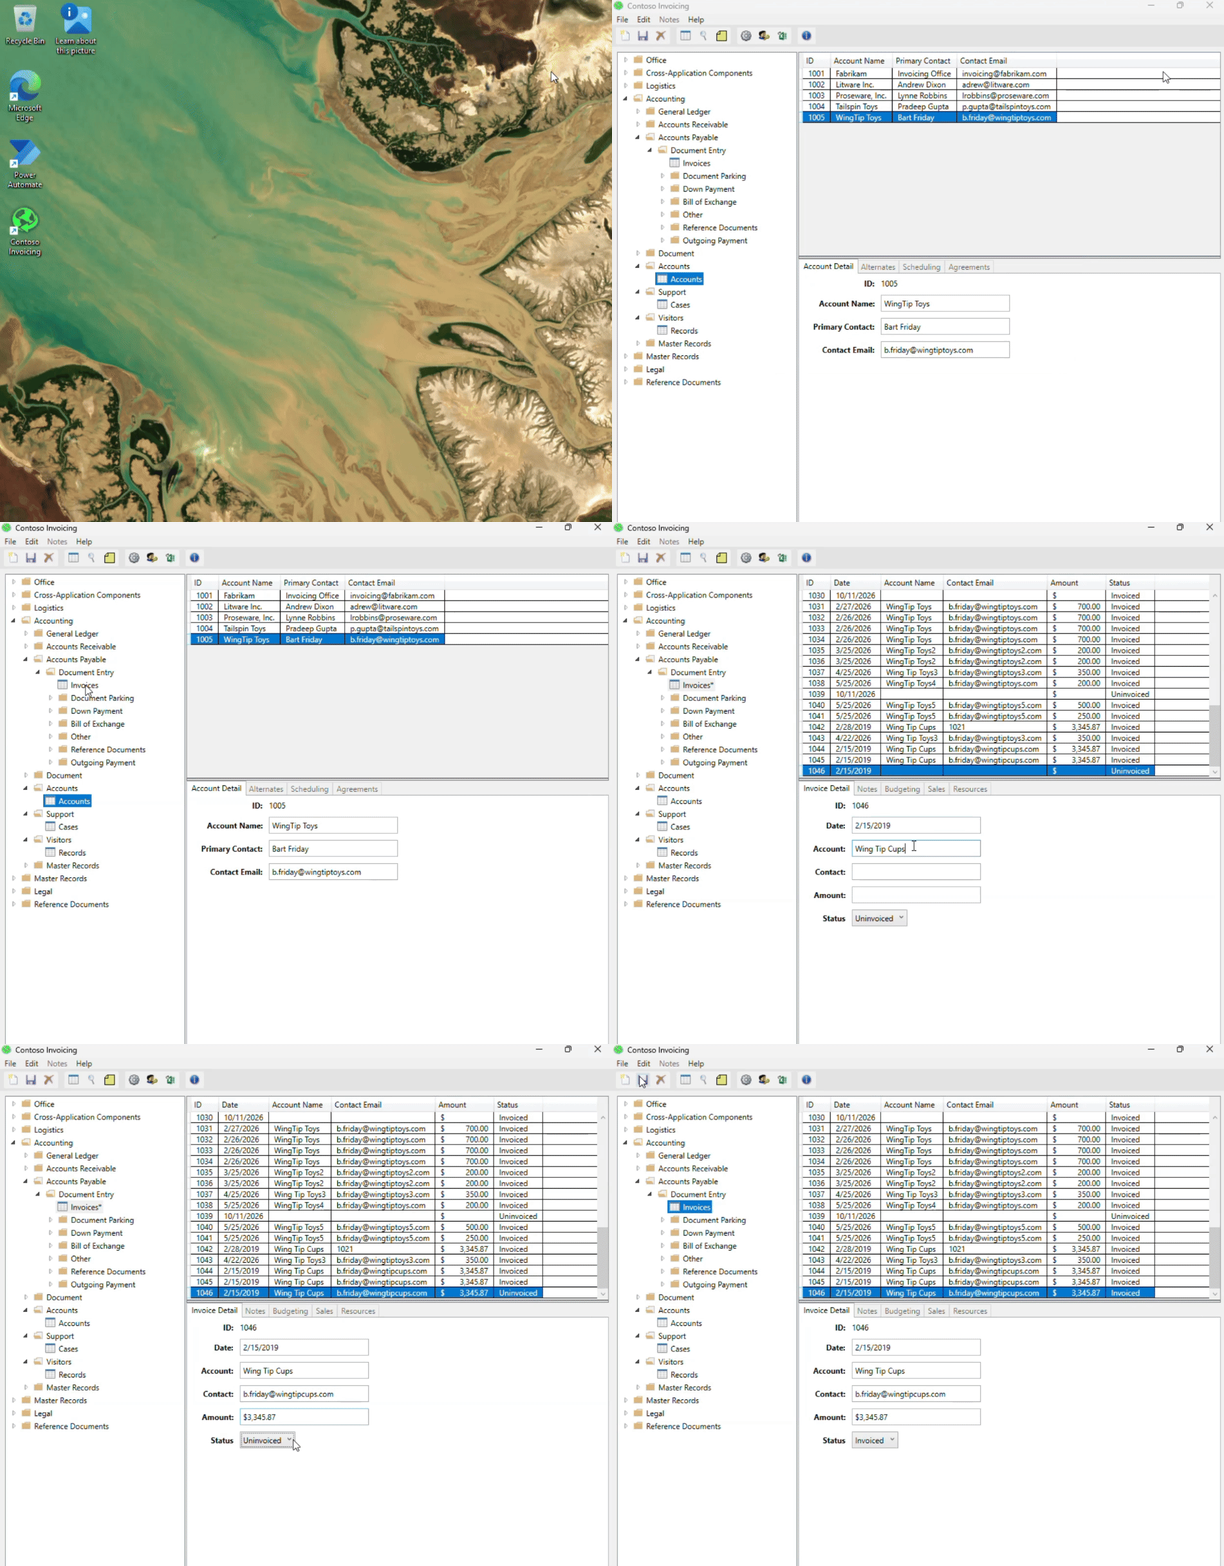
Below is an example of the remaining workflow data entry actions being automatically performed.
This lab demonstrated the design and build of a Robotic Process Automation workflow to fully automate some manual and labor-intensive data processing tasks. Activities such as document analysis and data-entry have been eliminated during the receival of invoices within email attachments. AI has replaced these tasks and allowed a human to only perform final reviews and approvals based on its output. Local desktop manipulation using keyboard and mouse movements have also contributed to more efficient and accurate data entry. Organisations or individuals can utilise some or all of these aspects as part of a similar or custom solution that enables them to automate their own business processes and tasks.